Sync Schedule
PRO See Free vs Pro.
The native Sync Schedule editor can run selected source synchronization, EPG synchronization, and output actions at configured times.
Create a schedule
- Open Settings.
- Select Sync Schedule.
- Select Add.
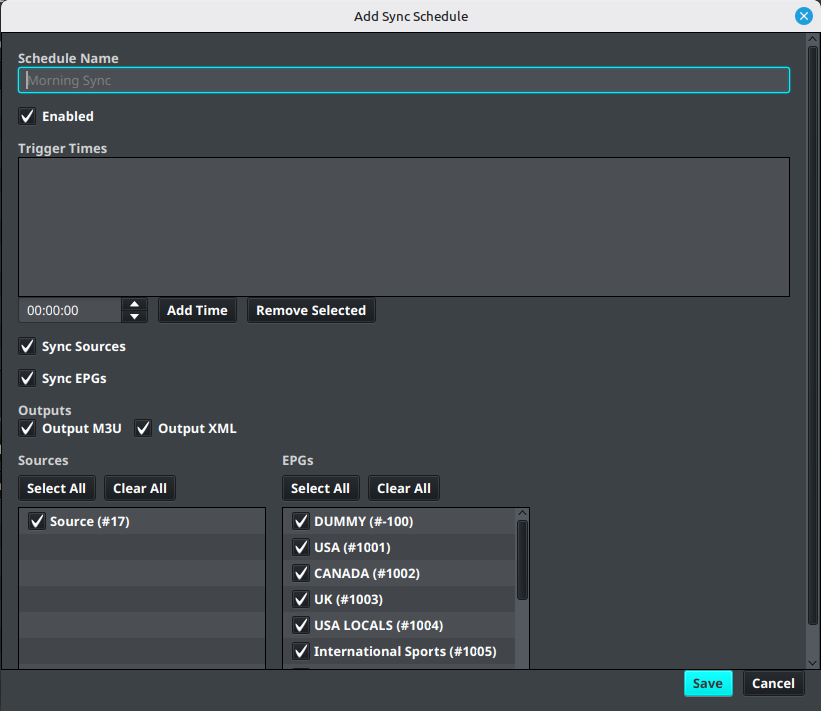
- Enter a Schedule Name.
- Add one or more Trigger Times.
- Select the actions to run:
- Sync Sources
- Sync EPGs
- Output M3U
- Output XML
- Select the sources and EPGs that the schedule should process.
- Leave Enabled selected when the schedule should run automatically.
- Select Save.
Apply the system schedule
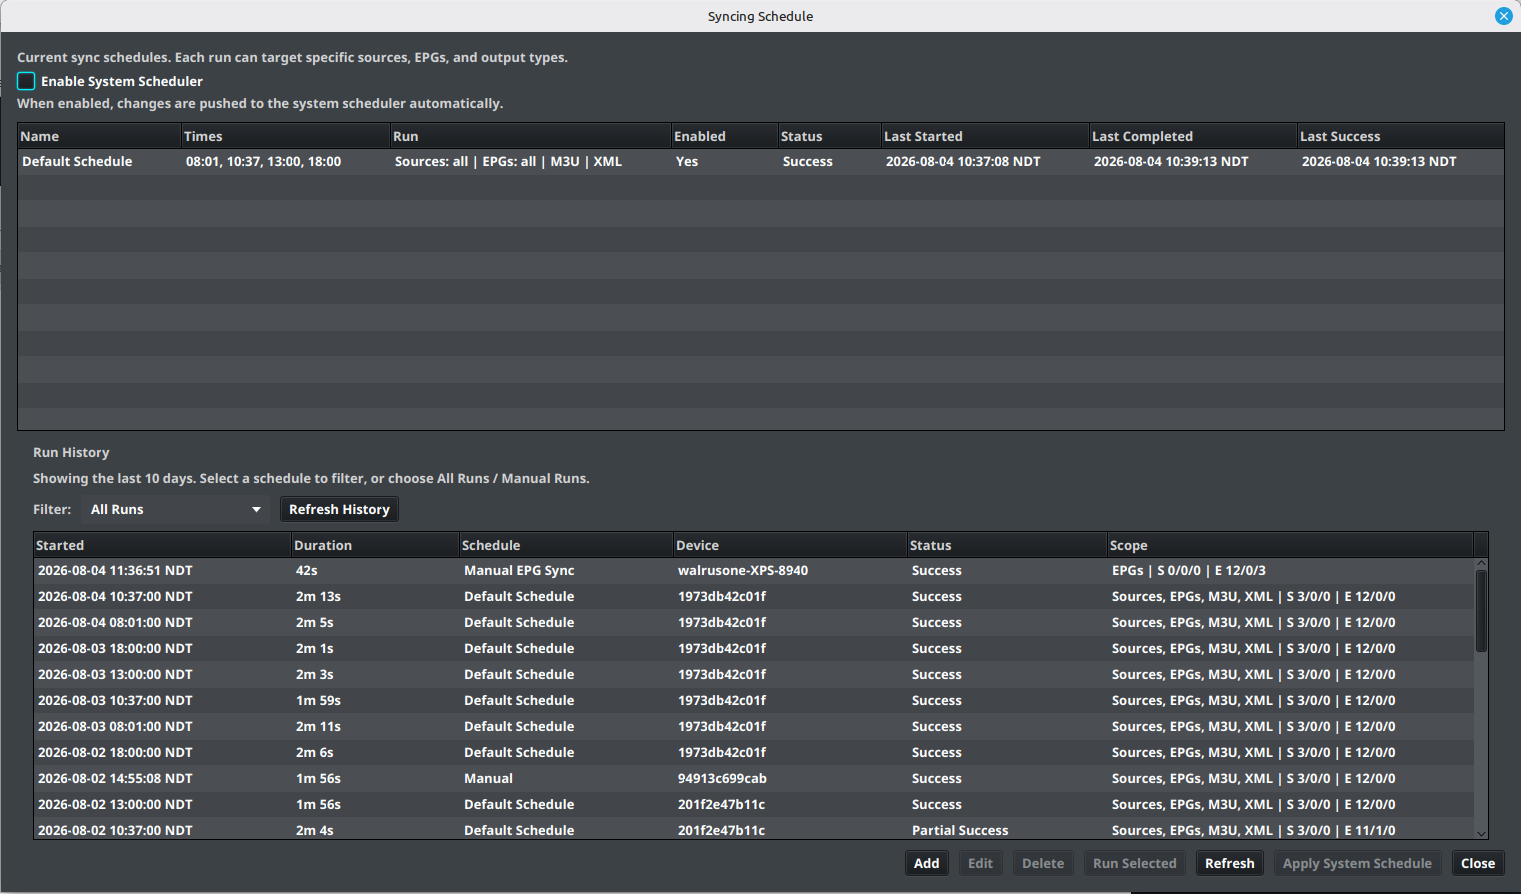
On supported desktop installations, enable Enable System Scheduler and select Apply System Schedule. This transfers the saved IPTVBoss schedule to the operating system scheduler.
Use Run Selected to test one schedule immediately. Use Refresh to reload the schedule table and recent run history.
Review schedule history
The schedule table shows status and recent start/completion information. Select a schedule to filter its recent run history.
When a run fails:
- Note the schedule name and start time.
- Review the run status and failed action.
- Open Logs and Diagnostics.
- Confirm that the source or EPG can synchronize manually before changing the schedule.
Warning
Do not create overlapping schedules that write to the same database at the same time. Choose one authoritative scheduler for a given installation.
For operating-system tasks, see External noGUI Scheduling. For an always-on XC Server, use Server Console schedules. Compare the methods in Choose a Scheduling Method.